As an Amazon Associate I earn from qualifying purchases.
If you’re looking for an adorable Christmas craft tutorial, here’s one that will show you how to make angel tree ornaments. Angels play a big part in people’s holiday season’s decorations. Angels are thought to protect every soul and bring positive vibes in the home.
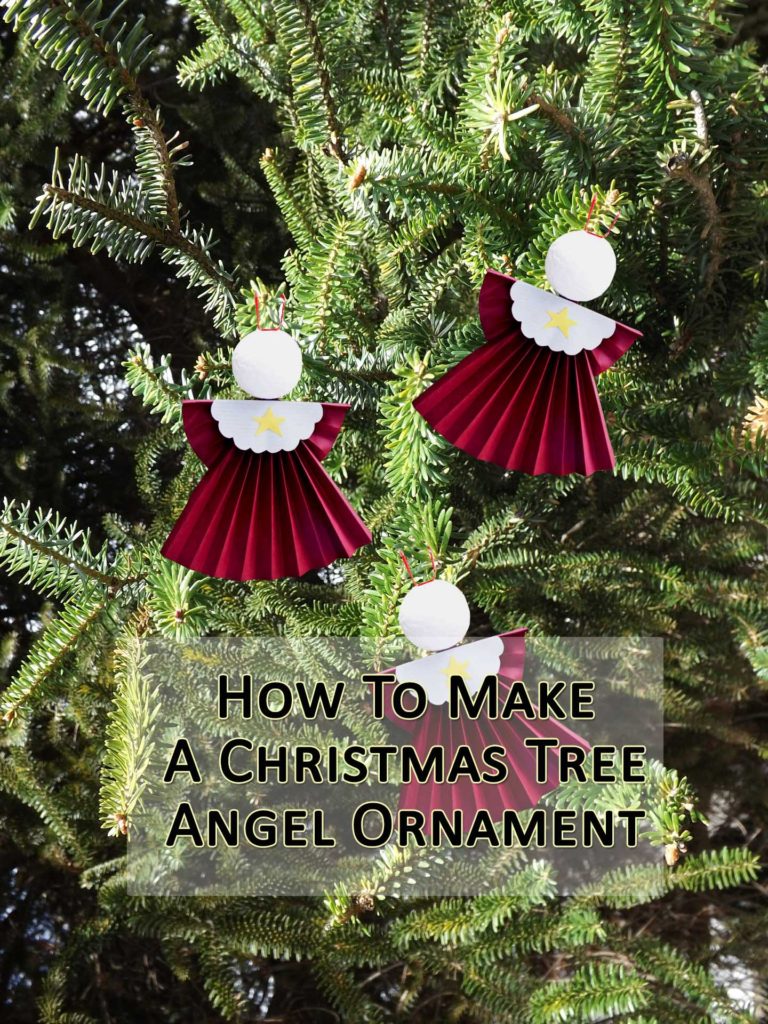 Christmas angel ornaments can be found in a wide array of models, dimensions and designs: from tabletop decorations to tree toppers. Angels make also wonderful gifts to be offered to collectors. These decorative items can be whether kept simple or, instead be extremely luxurious, dressed in clothes made out of lace, gold thread, with actual feathered wings.
Their price range vary from the single buck to dozens of dollars. But you can also easily make angel tree ornaments at home.
Make angel tree ornaments at home
In this tutorial, you are going to be shown how to make angel tree ornaments to be hung on the Christmas tree branches. You won’t need a large budget for such crafts. I suggest to create several of these embellishments so that you can have them hanging next to your most beautiful baubles, snowflakes, candy canes and other ornaments.
What you need to have on hand:
- Some mini styrofoam balls,
- A few popsicle sticks,
- 0.20″ W. ribbon (satin, lace: choose your favorite type of ribbon),
- Some sheets of colored cardstock (here we chose brown),
- 2 sheets construction paper (1 yellow, 1 white),
- Scissors,
- A hot glue gun, or for kids: craft glue.
Directions:
Cut the cardstock in two: one part must be 1/3 of the height of your cardstock sheet, the other must be 2/3.

Fold the 1 third of your cardstock in a zigzag orientation. The number of zigzags depends on your personal tastes – this part will feature the angel’s upper body and arms.
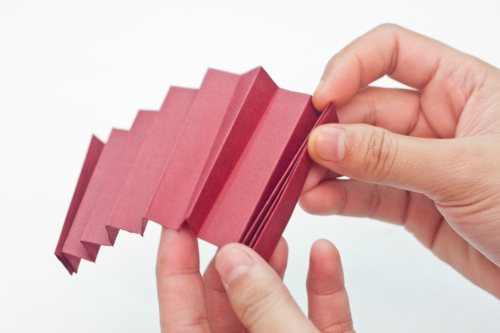
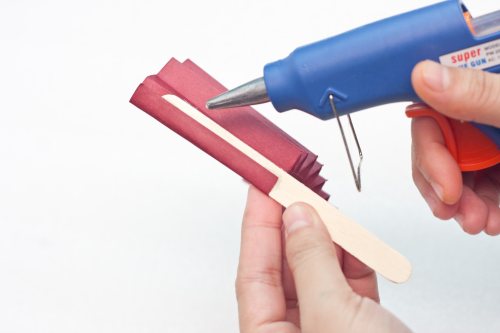
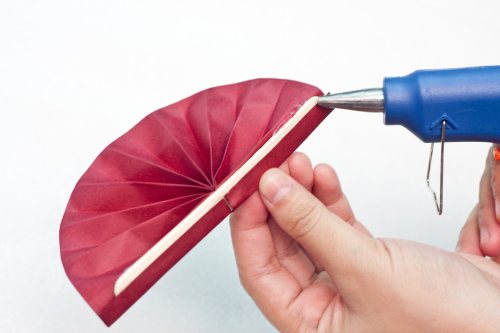
Glue one size of the folded paper to the wooden stick (see picture). Check so as to see if the inner end of your folded cardstock in located on the center of the stick.
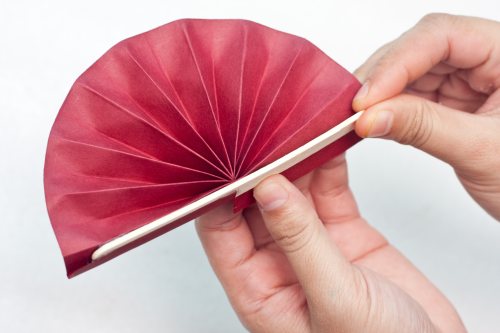
Now carefully stretch the other part of the cardstock so as to make it touch the other part of the stick (see picture above). Glue this part to the popsicle stick. Your angel’s arms and upper body part are almost finished.
Repeat the zigzag folding on the remaining 2/3 of the stockcard.
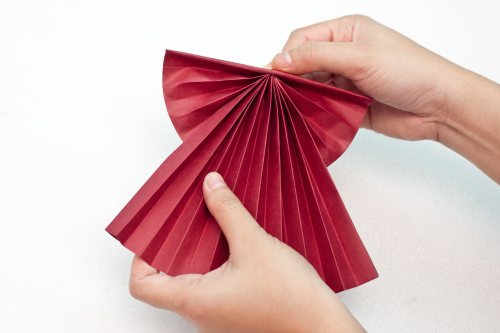
Put the top ends together so as to form some kind of folded triangle and glue it on the center of the popsicle stick (in-between the two parts of the 1/3 cardstock – see picture). This larger part of the craft features then angel’s gown.
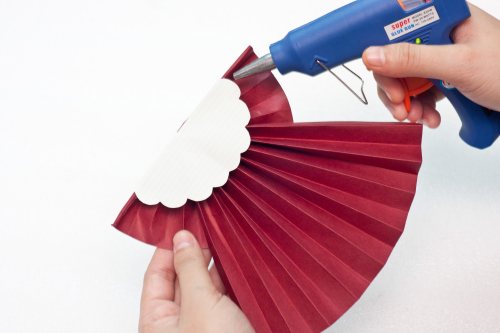
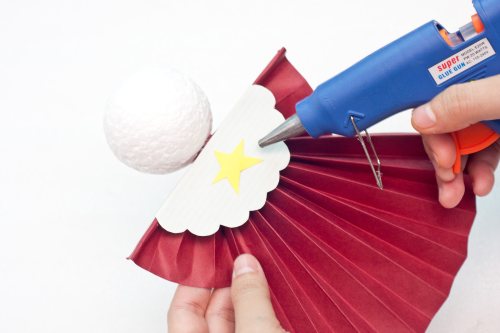
Cut half a circle out of the white sheet construction paper. While cutting it, create small indentations for a more ornamental effect (see image above). Glue this half circle on top end of the body and arms. Now your angel has a nicely adorned upper dress. If you have some craft punchers, you can even create some kind of lace effect.

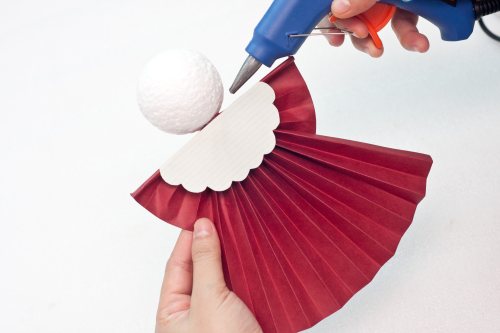
Now get the mini styrofoam ball and glue it on top center of the popsicle stick.
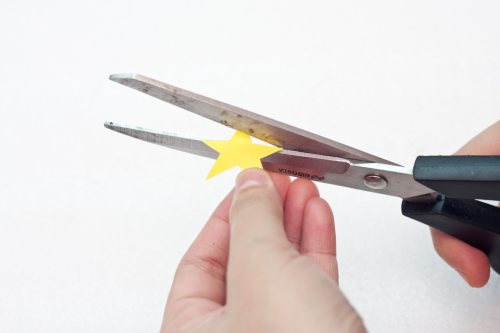
Cut out one or more tiny stars from the sheet of yellow paper. Glue the star or the numerous stars on the white semicircle.
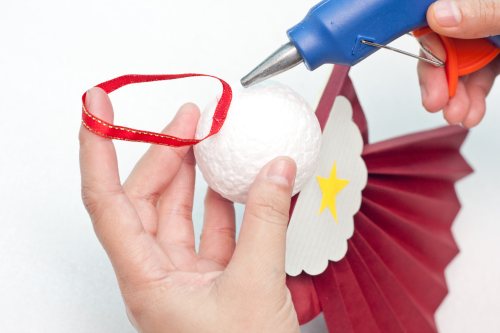
Create your angel hanger out of the ribbon you chose by cutting a piece of it. Glue the two ends of your ribbon on the top of the styro ball.
Bravo! You’ve just made a wonderful angel tree ornament.
Now go on and make some more of these cute angel tree ornaments. You can customize the head in any way you want:
- Add eyes, nose and mouth,
- Add hair,
- Glue artificial gemstones on the dress,
- Add feathered wings…
Add glitter to the angel’s gown for a sparkling effect. You can even use printed cardstock to feature the dress and arms of your angel. I hope you enjoyed this Christmas craft and I wish you a very Merry Christmas.


