
As an Amazon Associate I earn from qualifying purchases.
Step by Step Tutorial to Make Christmas Bells
Table of Contents
If you’ve ever wanted to know how to make Christmas bells out of terracotta pots, you’ve come to the right place. When Christmas comes around, parents look for activities kids can make at home. The pieces of artwork kids produce are mostly used as decorations or as gifts. Of course, they put so much love and work into these crafts.
I’ve come up with a great Christmas craft your kids can make this holiday season. Here is a step by step tutorial on how to make Christmas bells out of terracotta pots. These can be used as decorations next to the tree. Your kids can give them as a present for a loved one. And these crafts can even be used as window chimes so as to add a touch of magic to the night.
Materials to make Christmas bells out of terracotta pots
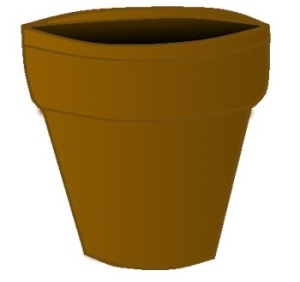
The Christmas bells we’re about to create are made out from recycled terracotta pots. You can use old pots from the garden or buy new ones. It’s up to you.
Here is the materials you will need:
- Small terracotta pots – Suggestion: reuse tiny pots if you have some on hand.
- Coloured acrylic paint, preferably Christmas colours such as red, green, and gold
Paintbrushes in different sizes. - Cord.
- Large beads made out of heavy materials.
- Optional: varnish.
Directions to make these cute Christmas bells
1 Clean the pots
Before starting to create your new window chime, wash the pots and let them to dry for a while. There shouldn’t be no dirt or clay left on the pots.
2 Paint time
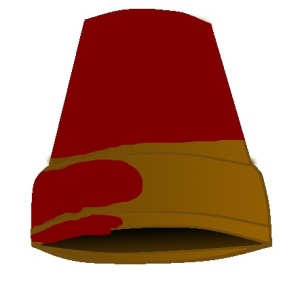
Next step: paint the pot the colour you prefer. I suggest to paint the pot red, green or gold. You don’t have to paint the inside of the pot. But doing so will give it a perfect aspect. If you use wooden beads, you may paint and/or varnish them as well.
Depending on the quality of the paint, you might have to apply two coats. Allow the paint to dry completely before going further.
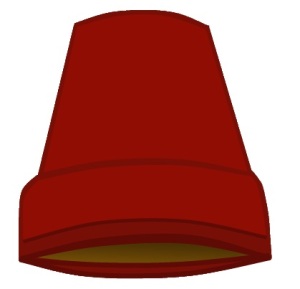
3 Decorate and varnish the Christmas bells
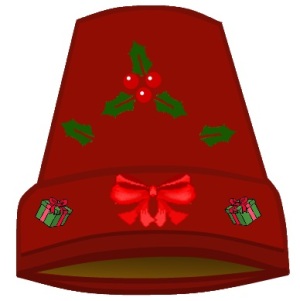
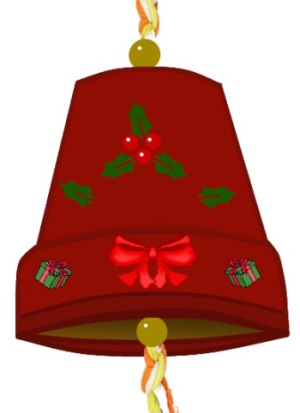
Once the pot has dried, decorate it. Here you’re given two different options. 1. If your children are old and skilled enough, they can paint holly leaves, candy canes or other Christmas related figures. 2. For an easier job, they can use Christmas scrapbooking elements on the pots. Images found in magazines will also work wonders. Optional: Use varnish in a spray can so as to provide the pots with a stylish look. Let the pot dry entirely before assembly.
4 Adding the cord to the pots
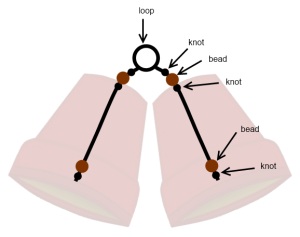
Once the varnish is set, it’s time to add the cord to the pot. If you plan on hanging the bells outside, make sure the cord is heavy. Indeed, the pot might have to experience strong winds in the winter season. However, the cord doesn’t have to be too big otherwise it won’t fit through the hole in the bottom of the pot. As you will see, we’re going to tie knots which can’t be larger than the beads.
5 Now on to the beads
So, tie a tight knot in one end of the cord, then string a big bead onto the cord and make another tight knot one inch higher than the bead. This will keep the bead secure inside of the pot. You now have 1 knot, 1 bead, 1 knot.
Pass the free end of the cord through the hole of the pot. In order to hide the pot hole, place a large bead on the piece of cord on top of the pot and make a tight knot. Make a loop to hang the bell and then cut the remaining cord.
6 Finishing touches
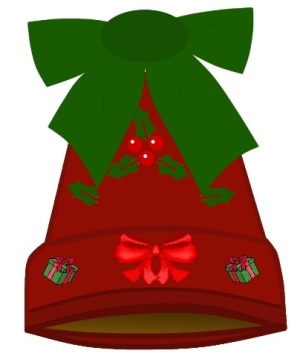
You can pimp up your Christmas bells using with a nice red bow that you glue or attach on top of the bell. Doing so will enable you to hide both the knot and the loop.
Alternative to make Christmas bells at home:
Did you know that you can have two Christmas bells made out of terracotta pots tied together? In this case, you’ll need to use a longer cord (a little more than twice the size of the previous cord). Let’s start from the loop you just made. Ensure that you tightly secure it. Then repeat the process in the reversed order:
- Tie a tight knot,
- Pass it into the bead,
- String the cord through the hole of the second terracotta pot,
- Tie a tight knot,
- Add a bead 1 inch below
- Tie a last knot
- Cut the cord.
That’s it. Children can easily do such a Christmas craft. Only make sure that an adult cuts the cord if your kids are too young to do it themselves. And remember that terracotta pots may be used for many other types of Christmas projects!
Image credit: yellow/orange cord and knot on the picture is courtesy of © Photographer: | Agency: Dreamstime.com


